Intro to Setting up Lead Forms
This has to be one of the most important and if not, the most important aspects to anyone’s efforts in tracking and making sure your online marketing efforts are going well: Goal Tracking.
I’ve seen and heard it time and time that people just “know that their marketing is or isn’t working” and that they have a “gut feeling” about what is or isn’t converting on their website, and why.
WOW. To show just how I feel about that, just admire this beautiful meme below:
You have to know your numbers! You have to know what converts on your site and what has the highest profitability.
So, now that we’ve established that having tracking in place is necessary, let’s go through the process of setting up the most common goals in Google Analytics:
Lead Forms Setup
This is probably the most common form of online conversion that is tracked.
The first thing that needs to be done is to know if after filling out the form, does the visitor get redirected to a “Confirmation” or “Thank You” type page.
If not, then some version of a Thank Page URL needs to be setup.
In WordPress, I would just add a page and call it “Thank You Page” with a URL of site.com/thank-you and make sure the form plugin or page redirects to that page.
Once that is done you’ll be able to setup and track properly in Google Analytics.
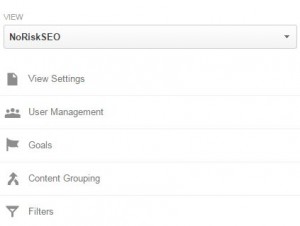
So, to setup the goal in Google Analytics, go to the “Admin” section.
Under “Admin”, look for “View”. Under “View” you’ll see a sectioned labeled as Goals!
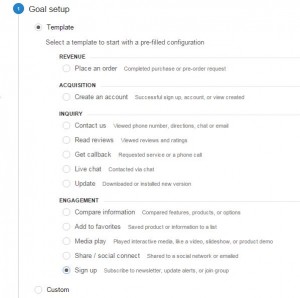
Click on “New Goal”. There will be a screen that appears like this:
Click on “Sign-Up” Under “Engagement”
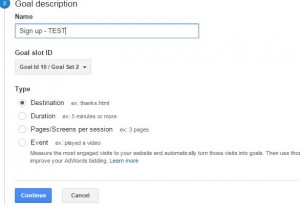
This is where you’ll enter in the “Name” of the conversion.
Next, you’ll leave the “Destination” selection and hit “Continue”.
Under Destination, select “Begins with” and your URL. So for the example that I mentioned above with the /thank-you page, you’ll enter that.
It should look like this:
There are a couple additional aspects to consider before completing and saving the goal.
The most common is the “Value” of the lead. This section is an arbitrary value and one that would be how much you pay or would be willing to pay for an exclusive lead for your business. Just for this setup, I’ll assign a $50 value. This will help when figuring out ROI from your marketing channels.
Lastly, double check to make sure that goal can be verified of the last few days. It should give a % of conversions. (Note: If you had to create a “Thank-You” Page, the “Verify this Goal” Section.)
Click the “Save” and you’ll have a goal setup.
CONFIRMATION:
One final thing I like to do to make sure that the goal is setup properly and that my lead form is tracking is to submit a test submission.
So, right now, go to your form that you set the goal up for and submit some test information.
After that, wait a few minutes (10-15 minutes), hit “Refresh” on your browser and check to make sure that your goal is triggering.
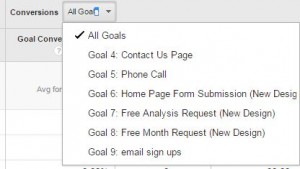
VIEWING GOAL in Google Analytics:
After the goal is setup and you’ve tested a submission to see if it is tracking you’ll be all set!
(Note: For this example you’ll test the labeled goal as “TEST Goal”)
Conclusion:
So, now that you’ve mastered setting up a basic lead or form submit goal in Google Analytics, let’s move on to learning how to setup call tracking as a goal!
As always, If you have questions or comments, please let me know!


